


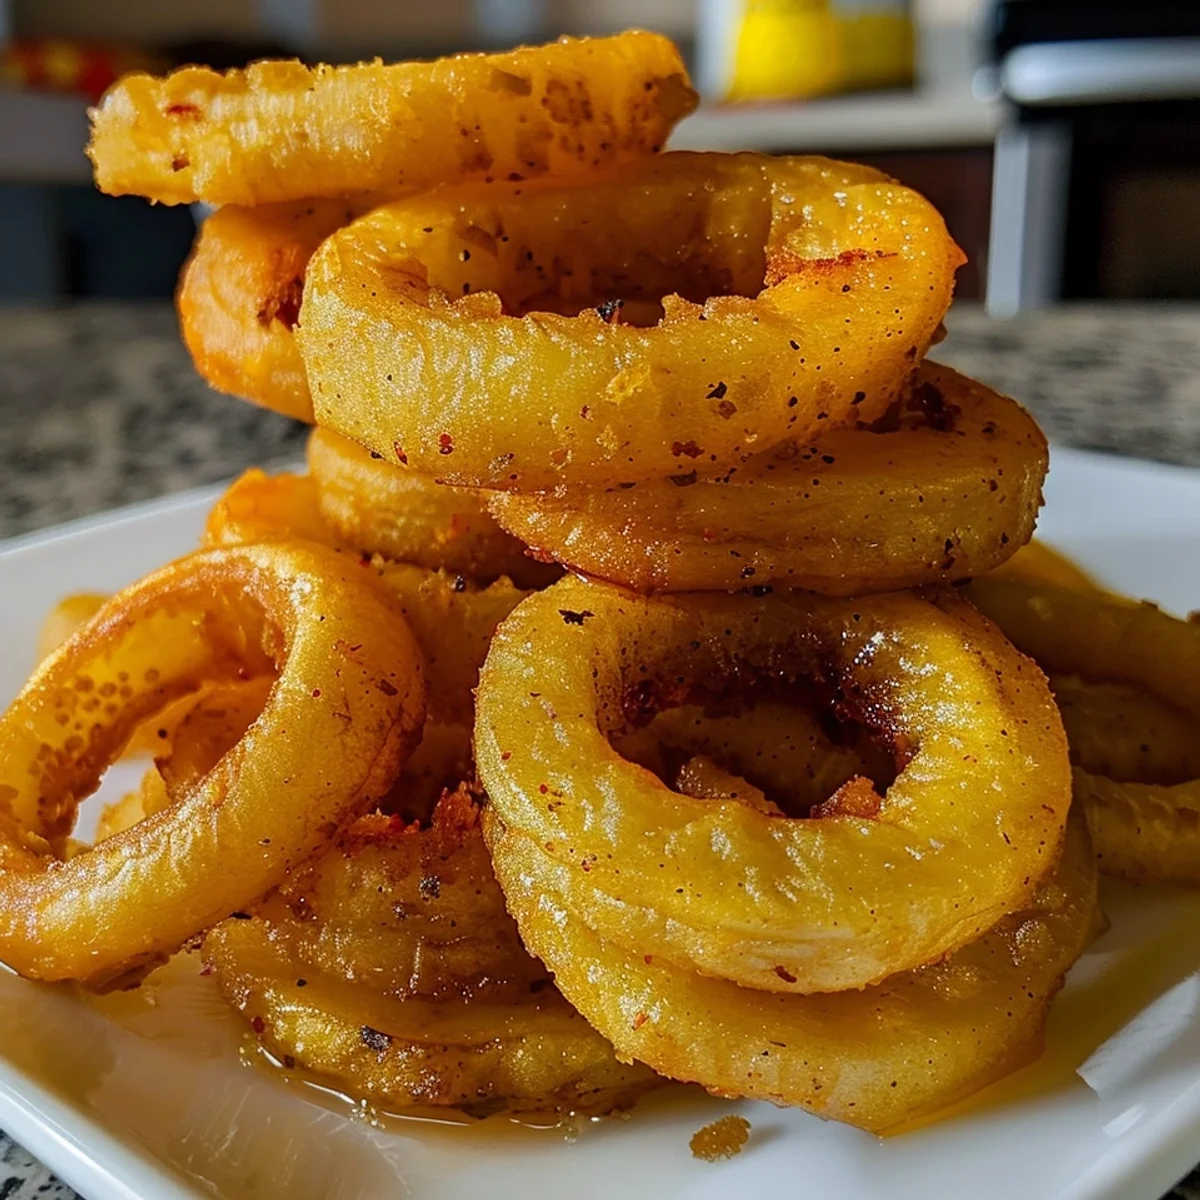
A tangy and flavorful pickled banana pepper rings recipe that adds zest to any meal!
You know, the kitchen is my happy place, and there’s just something so magical about transforming fresh veggies into something tangy and delicious! I remember the first time I discovered how to pickle banana peppers. I had a mountain of them from my garden, and honestly, I had no idea what to do with them. I thought, "Why not try pickling?" I smashed a few jars, spilled vinegar everywhere (oops!), and ended up with a kitchen that smelled like a pickle factory. But boy, when I took a taste of those pickled banana pepper rings, it was like fireworks in my mouth! The sweet and tangy combination made me feel all warm and fuzzy inside, like a hug from grandma. Now, every summer, I make a batch and stash them away for the winter months. They’re perfect on sandwiches, in salads, or just straight outta the jar when I need a little snack! Trust me, once you try these, you’ll find yourself whipping them up again and again!
Once, I got a little too ambitious and decided to double the recipe without checking my jars. Spoiler alert: I ran out of jars, and the counter looked like a pickled war zone! But you know what? It was one of the best mistakes ever because I discovered how incredible these little rings are when they’ve been steeped just a bit longer!
Ingredients
- Banana Peppers: These beauties are the star of the show! They give you that perfect balance of sweetness and heat. Honestly, don’t skimp on these; they’re what make this recipe sing!
- White Vinegar: The tanginess you crave! I always go for the good stuff-don’t even think about using that cheap stuff. I did once, and let’s just say, never again.
- Water: Just plain old H2O; it helps balance out the vinegar. I sometimes use sparkling water just for fun, and it gives a little fizz to the pickling process-who knew?
- Sugar: A little sweetness to counter the acidity. I’ve tried it with honey before, and it was... interesting, but stick with sugar for the classic flavor!
- Salt: This is your basic kitchen must-have! I use kosher salt because I like the texture, but don’t go overboard; too much salt can ruin the whole vibe.
- Garlic: I always add garlic! You can’t go wrong with garlic, right? Just know, the more you add, the more garlicky your pickles will be-so if you’re not a fan, maybe dial it back a bit.
Instructions
- Prep the Peppers:
- First thing’s first, I rinse my banana peppers like they just got back from vacation. Then, I slice ‘em into rings. This is where I always forget to wear gloves, and then I’m stuck with burning hands; oops! Just remember to remove the seeds if you want less heat!
- Make the Brine:
- Now, in a pot, I mix the white vinegar, water, sugar, and salt. I bring that to a boil and watch it bubble like it’s a science experiment. Honestly, the smell is intoxicating! Just don’t get distracted; I once forgot about it and ended up with a pot of molten vinegar!
- Add Garlic:
- Next, I throw in the smashed garlic cloves and let them hang out in the brine for a minute. They’re like the party crashers of this recipe-total game changers! The aroma wafts through the kitchen, and I start dreaming about all the sandwiches I’ll make!
- Pack the Jars:
- While the brine is bubbling away, I grab my jars (cleaned, of course) and pack in those beautiful pepper rings. It’s kind of like playing Tetris, and I’m always trying to get them just right. Sometimes I spill a few on the floor; oops again!
- Pour the Brine:
- Carefully, I pour the hot brine over the peppers, making sure they’re submerged. This is where I usually burn my fingers (note to self: use a funnel next time). I secure the lids and let them cool down while I daydream about what I’ll pair them with!
- Wait and Enjoy:
- I let the jars sit in the fridge for at least 24 hours before digging in. It’s so hard to wait, but trust me, the flavors deepen and get better. I usually sneak a taste before the 24 hours is up, just to 'check' on them, you know?
Every time I make this recipe, I can’t help but smile at the memories it brings back. From that first chaotic pickling experience to sharing jars with friends, this dish has become a staple in my kitchen. It's not just about the pickles; it’s about the laughter and stories that come with them!
Storage Tips
These pickled beauties can last in the fridge for about 2-3 months. Honestly, I always finish mine way before that, but if you’re storing them, make sure they’re sealed tight. I once left a jar open in the fridge, and let me tell you, the smell was *not* pleasant! I always keep them in the back of the fridge where it’s colder, away from the door-those temperature swings are not good!
Ingredient Substitutions
If you're short on banana peppers, you can try jalapeños for a spicier kick, but be ready for the heat! I tried it once with green bell peppers, and let’s just say, it lacked the zing. You can swap out white vinegar for apple cider vinegar too; it gives a nice sweetness, but I prefer the classic tang. Just know, every tweak changes the vibe, so experiment away!
Serving Suggestions
Pair these with sandwiches, burgers, or toss them in salads for a pop of color and flavor! I love them on a spicy turkey sandwich with a cold glass of lemonade. Or, for an easy appetizer, serve them with cream cheese on crackers-yum! And let’s be real, they make the perfect snack to munch on while binge-watching your favorite rom-com. It’s the ultimate comfort combo!
Cultural Backstory
Pickling is an age-old tradition that spans cultures! My family always had pickled veggies at the table, and it reminds me of family gatherings filled with laughter and stories. I discovered these banana peppers through a friend who shared her family recipe. It felt like a secret handshake, inviting me into her world. There’s something so beautiful about preserving food and memories in a jar.
In the end, this pickled banana pepper rings recipe is more than just a snack; it’s a little jar of memories and love. I can’t wait for you to try it and make your own stories. Let me know how it goes; I’d love to hear about your kitchen adventures!
Frequently Asked Questions
- → Can I use other types of peppers?
Absolutely! I’ve used jalapeños and even bell peppers. Just remember the flavor will change depending on what you choose!
- → What do I do if my pickles are too spicy?
If they’re too spicy, you can add a little extra sugar to balance it out or mix in some sliced cucumbers to tone down the heat.
- → Can I process these for shelf storage?
Yep! If you want to store them long-term, just process them in a water bath canner for about 15 minutes. I did that once, and they were a hit!
- → How long will they last?
In the fridge, they’ll last 2-3 months, but honestly, they’re usually gone way before then in my house!
- → Can I make this vegan?
For sure! This recipe is naturally vegan, so you’re all set to go!
Pickled Banana Pepper Rings Recipe
A tangy and flavorful pickled banana pepper rings recipe that adds zest to any meal!
Ingredients
Main Ingredients
- Banana Peppers
- White Vinegar
- Water
- Sugar
- Salt
- Garlic
Seasonings & Spices
- Dill
- Black Peppercorns
Garnish & Toppings
- Red Pepper Flakes
- Fresh Dill
Optional Extras
- Jalapeños
- Cucumbers
Instructions
-
1Prep the PeppersFirst thing’s first, I rinse my banana peppers like they just got back from vacation. Then, I slice ‘em into rings. This is where I always forget to wear gloves, and then I’m stuck with burning hands, oops! Just remember to remove the seeds if you want less heat!
-
2Make the BrineNow, in a pot, I mix the white vinegar, water, sugar, and salt. I bring that to a boil and watch it bubble like it’s a science experiment. Honestly, the smell is intoxicating! Just don’t get distracted, I once forgot about it and ended up with a pot of molten vinegar!
-
3Add GarlicNext, I throw in the smashed garlic cloves and let them hang out in the brine for a minute. They’re like the party crashers of this recipe - total game changers! The aroma wafts through the kitchen, and I start dreaming about all the sandwiches I’ll make!
-
4Pack the JarsWhile the brine is bubbling away, I grab my jars (cleaned, of course) and pack in those beautiful pepper rings. It’s kind of like playing Tetris, and I’m always trying to get them just right. Sometimes I spill a few on the floor, oops again!
-
5Pour the BrineCarefully, I pour the hot brine over the peppers, making sure they’re submerged. This is where I usually burn my fingers (note to self: use a funnel next time). I secure the lids and let them cool down while I daydream about what I’ll pair them with!
-
6Wait and EnjoyI let the jars sit in the fridge for at least 24 hours before digging in. It’s so hard to wait, but trust me, the flavors deepen and get better. I usually sneak a taste before the 24 hours is up, just to 'check' on them, you know?
Notes
Don’t skip the gloves when handling the peppers; your hands will thank you later!
Common mistake? Forgetting to let the brine cool a bit before pouring-trust me, it splashes!
Letting the peppers sit for at least a week really amps up the flavor!
Equipment
Please check ingredients for potential allergens and consult a health professional if in doubt.
Nutrition Facts
It is important to consider this information as approximate and not to use it as definitive health advice.
Comments
Leave a Comment